8 Easy Steps
Step 1: Unboxing Your Studio Kit
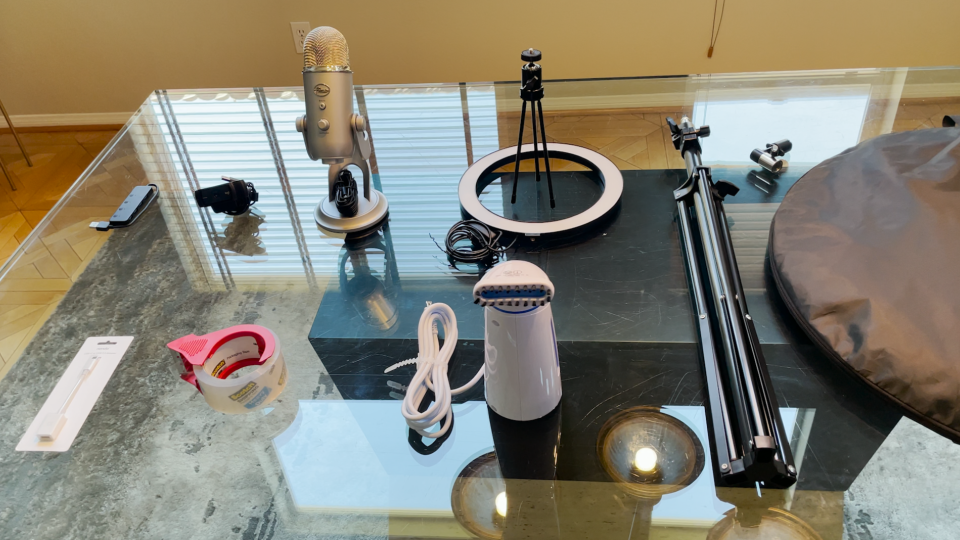
Take all equipment out of their respective boxes. Locate and organize each item using the checklist provided. We recommend placing all of the items onto a table for ease of access and organization. When opening the kit, please do not throw away any boxes or packaging.

Step 2: Selecting Your Location
When selecting a location for the video shoot, it is best to keep the following things in mind:
> Select a room with a window for natural light
> Face the window so the natural light shines on your face
> Allow about 4 feet of room behind your chair
> Choose a smaller room to minimize echo
> Make sure the room has a door to reduce outside noise
> Close to the internet source for best WiFi (hardwired is best)
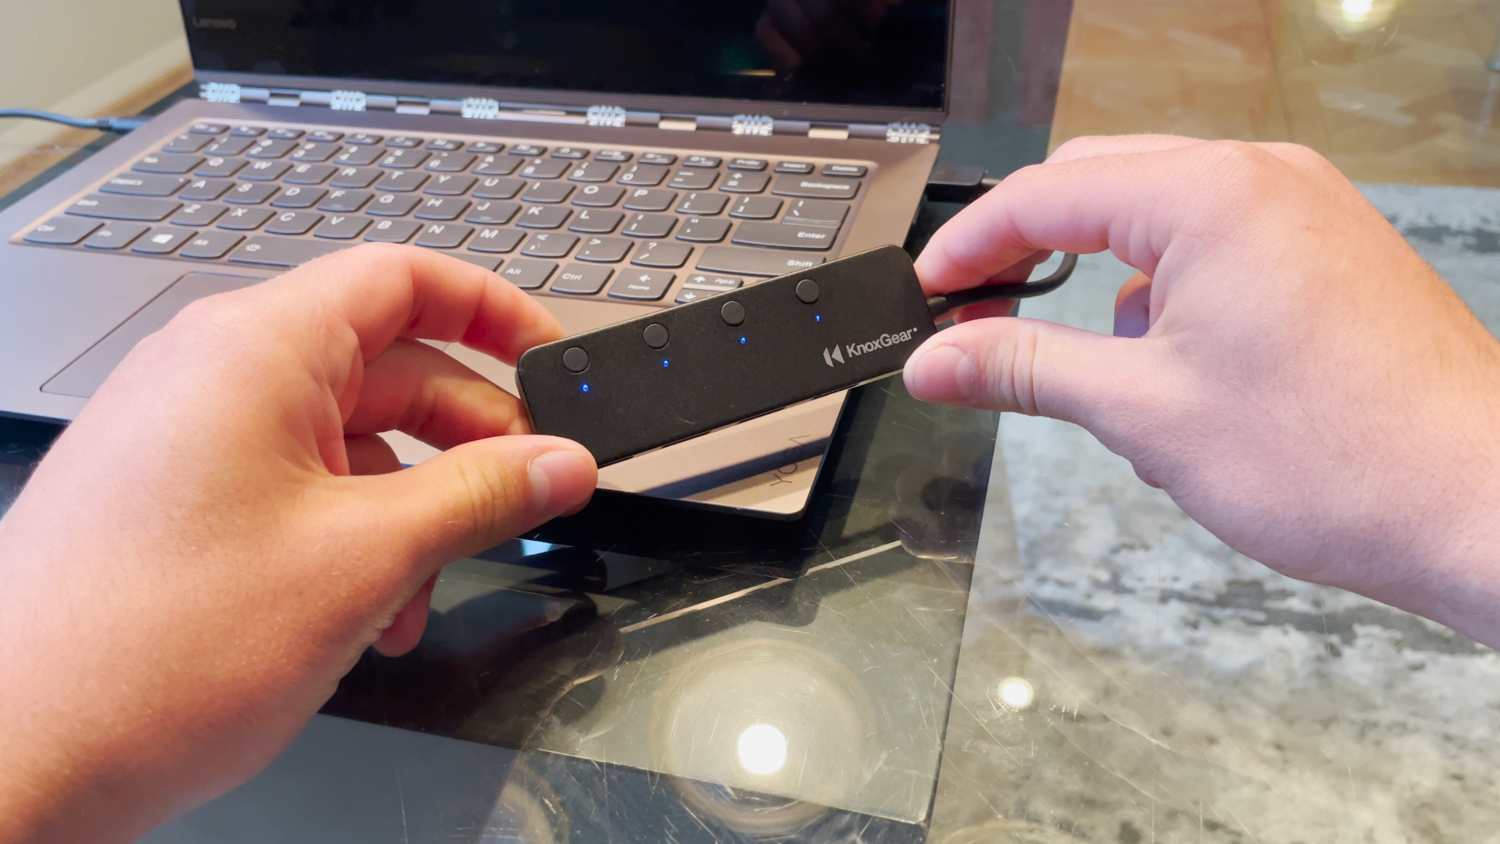
Step 3: Establish Connection
Locate the USB port from our kit, and plug it into your computer. Press all four buttons on the top, enabling the connection. Once pressed, the lights at the top should be blue.
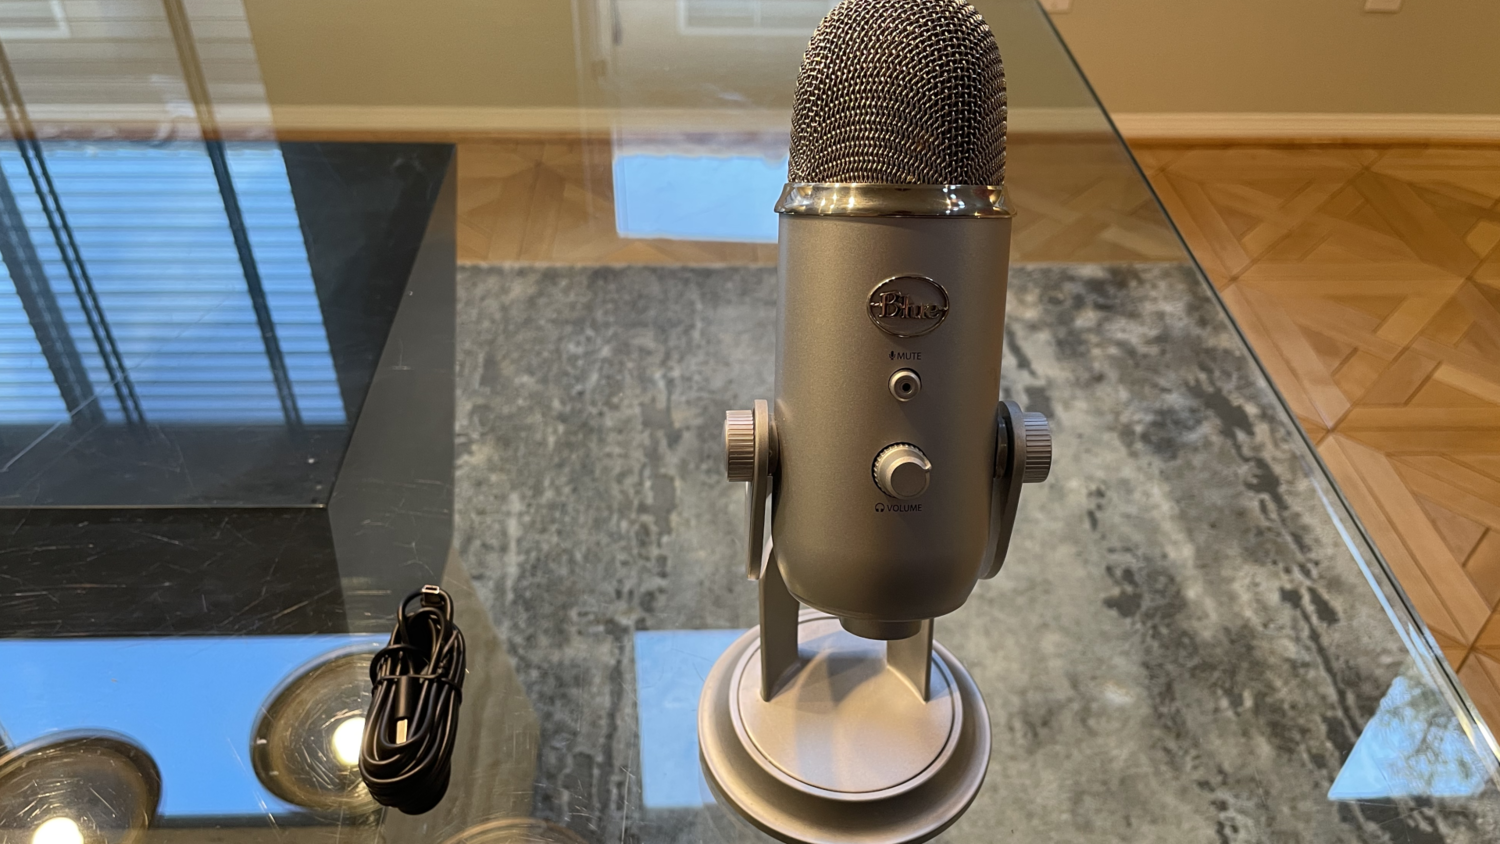
Step 4: Set Up Microphone
Locate the Blue Yeti Microphone. Take the Blue Yeti Microphone out of the box and plug in the micro USB wire. The port is located at the bottom of the microphone. Turn the microphone upright, so the tip of the microphone is pointed upwards. Use the screws on the side of the microphone to lock it into position.
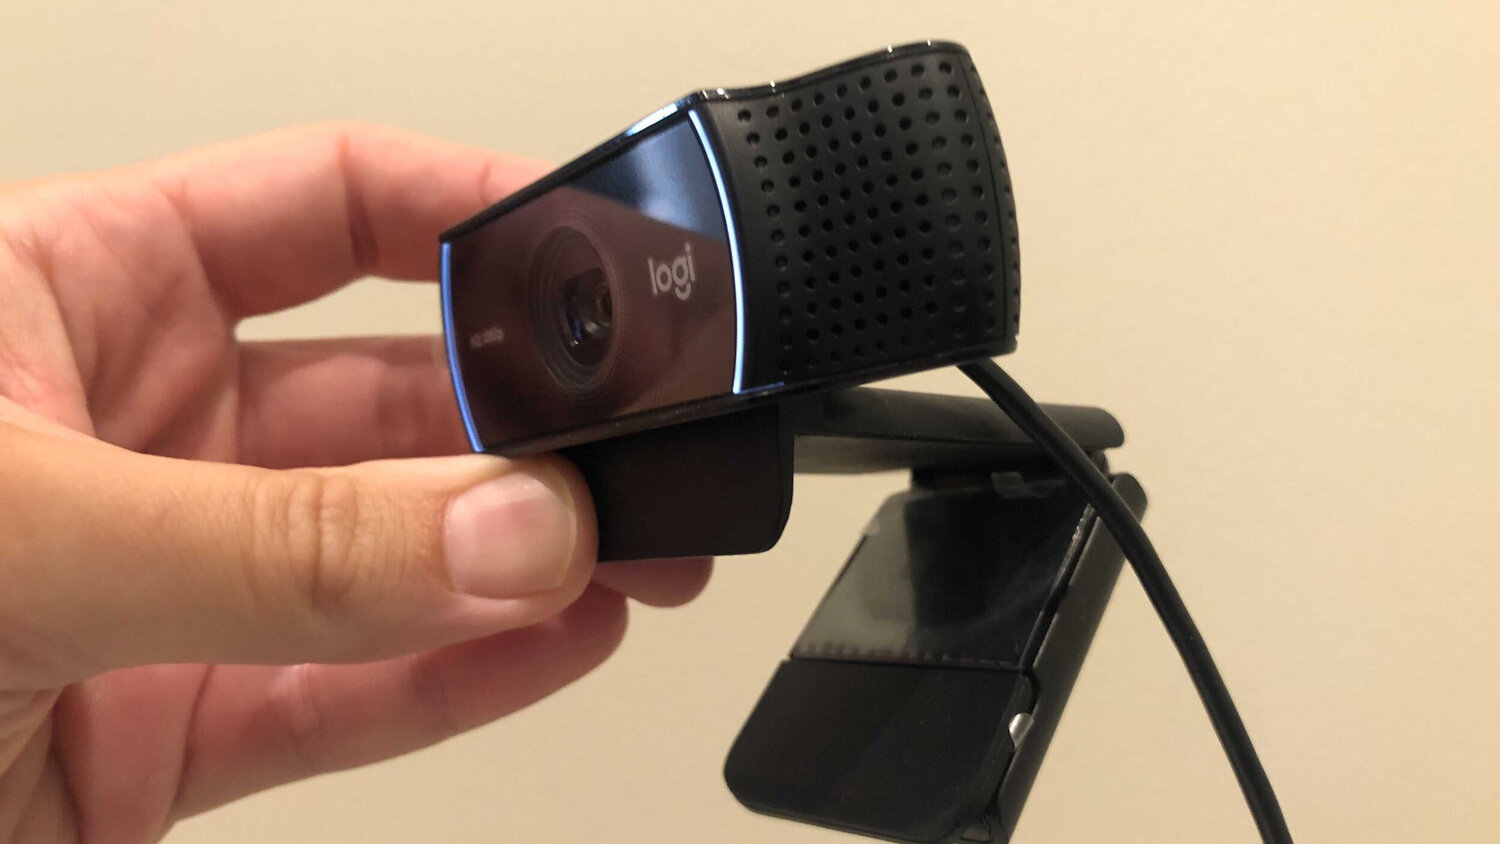
Step 5: Set Up Camera
At the bottom of the camera, you will see a latch that will allow the camera to anchor itself to the top of your screen. Open the latch and place it on the top of your monitor. Plug in the camera to the USB port.
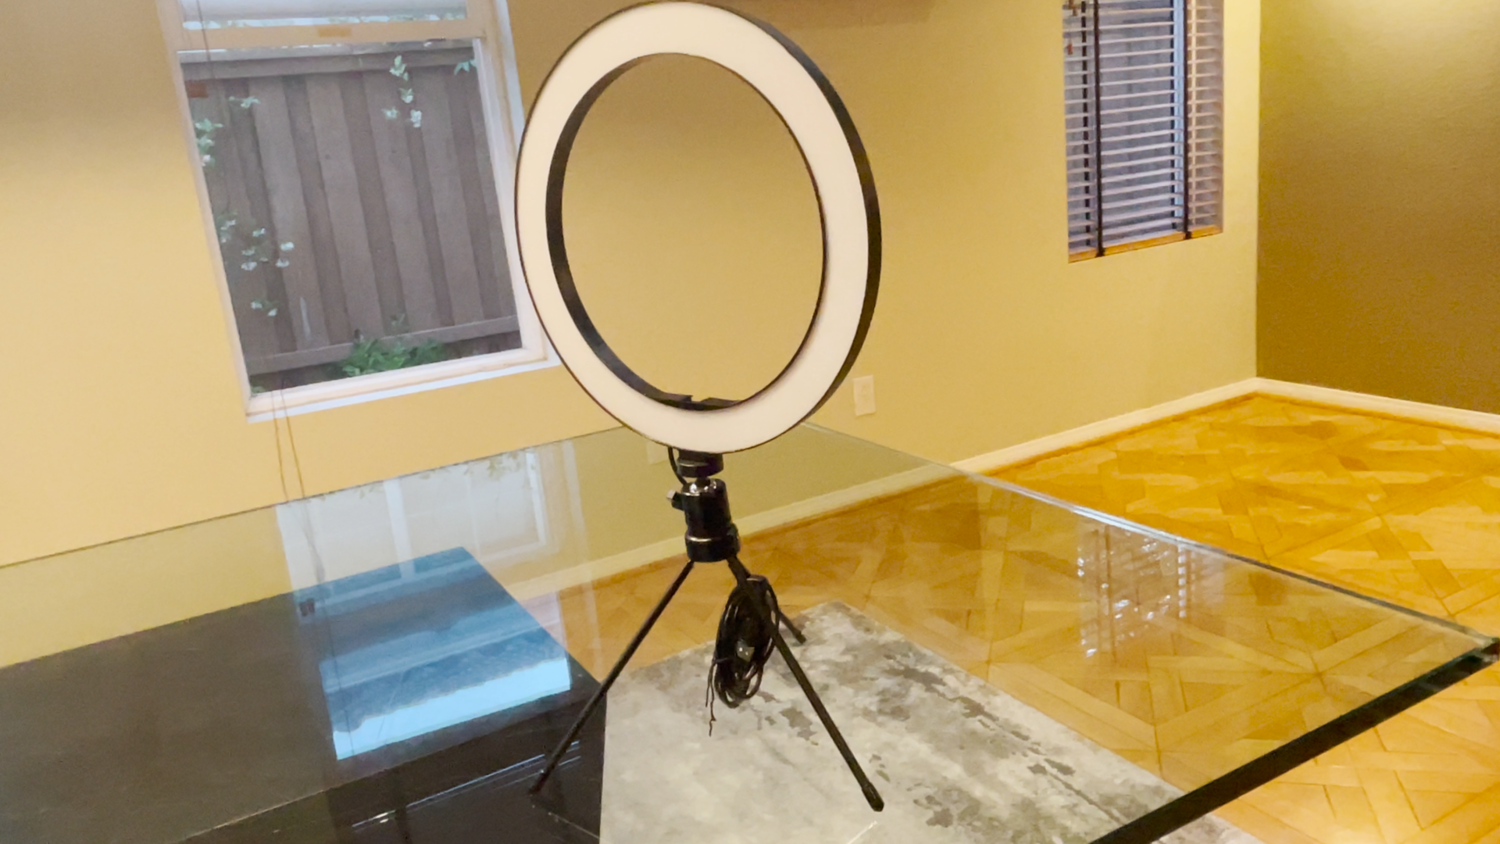
Step 6: Set Up Ring Light
Locate the ring light and the ring light stand. Screw in the stand, and open the three legs. Plug the wire into the four-port USB hub. Once plugged in, the remote control will have a small light illuminated. By pressing the power button, the ring light will turn on.
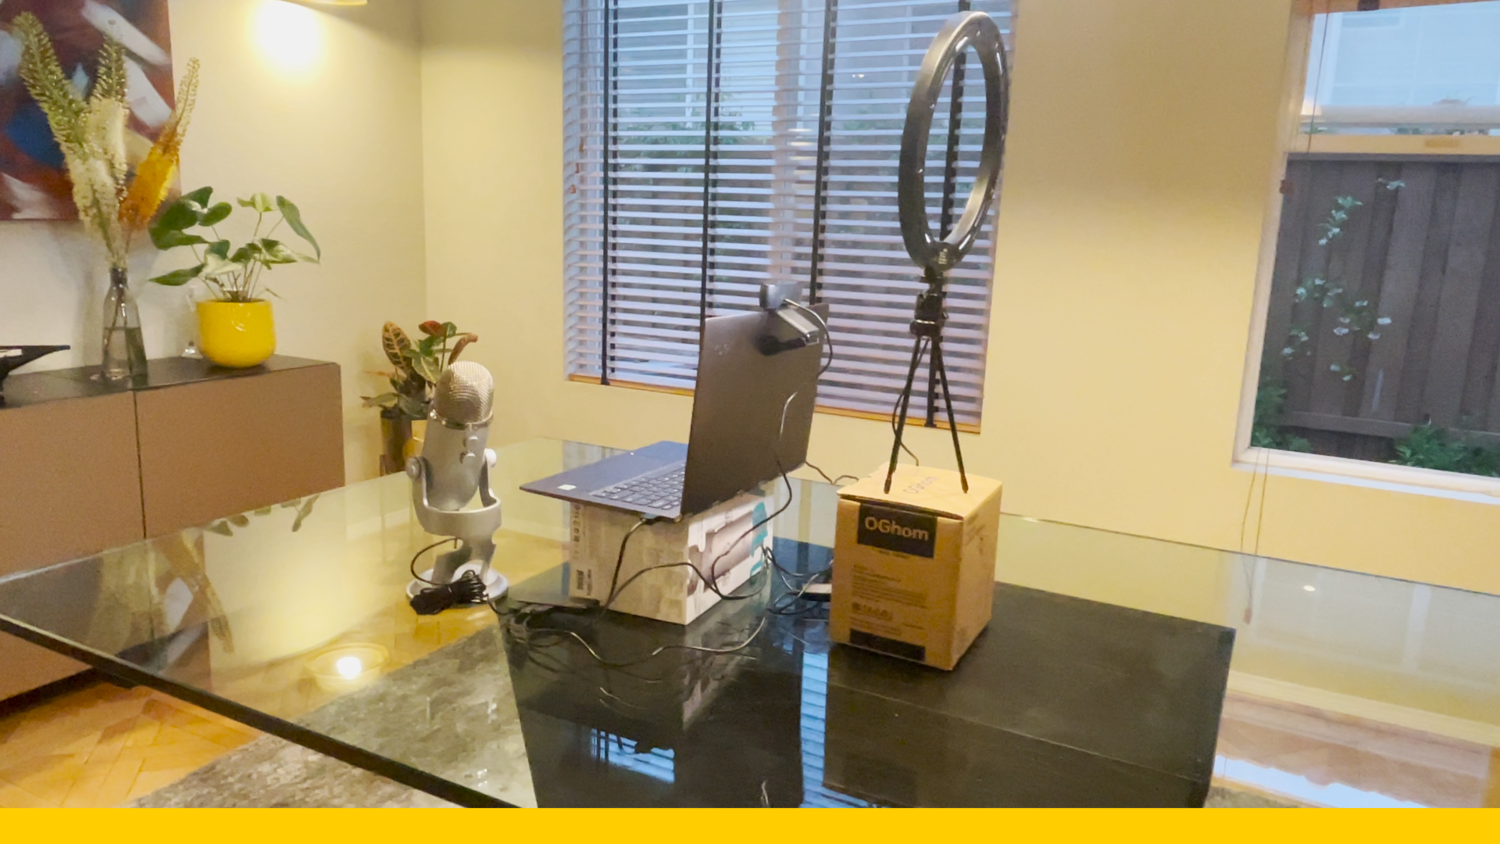
Step 7: Make Adjustments
The camera, which is resting on top of your monitor, needs to be level with your head when sitting. To achieve this, elevate your screen by placing some boxes or books underneath. In addition, place some boxes or books underneath the ring light to elevate it above the camera, as shown.
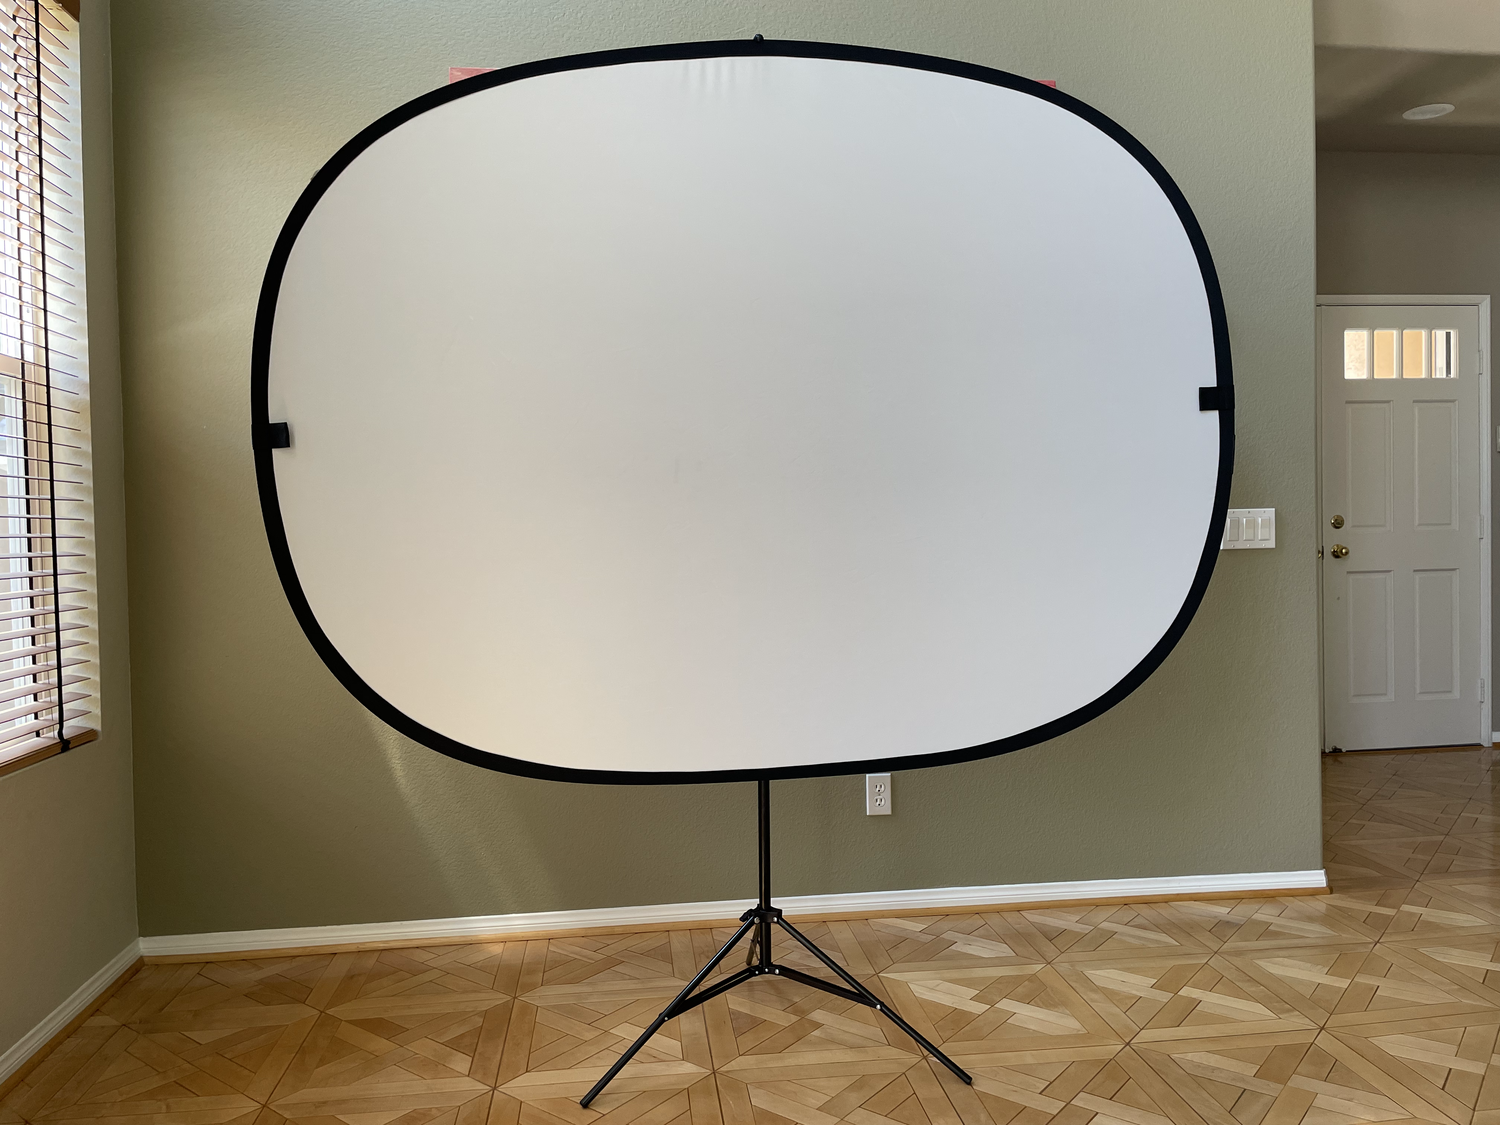
Step 8: Set Up Backdrop
The backdrop has three components: the backdrop, the stand, and the hook. Locate the stand and open the three legs by loosening the knob and pushing the slider towards the bottom. Then, tighten knob at the bottom for a secure fit. Please do not over tighten any knobs, as this will damage our equipment. Next, locate the backdrop hook. Slightly unscrew the backdrop hook and affix it to the top of the stand. Then, tighten the knob back into place. After that, raise the stand by loosening the bottom knob, raising the stand, and tightening the knob back into place. Repeat this process for the top section. The stand should now be taller than you. Next, locate the backdrop. Unzip the black bag, and take out the backdrop. Use the white side of the backdrop and hook the backdrop horizontally. To hook the backdrop, open the clamp of the hook, and angle the top of the backdrop in.